Over the last few years, I have learned (unintentionally) to take better pictures with a smartphone for three reasons. The first reason is that I don’t actually own a DSLR camera! The second reason is that running a blog, requires visuals to illustrate your sayings and showcase best who you are. Thus, I literally had to take pictures with my smartphone and get better at it. And the third reason is that I have taken well over 5000 pictures with my smartphone. I’m far from being a professional photographer, but I’ve certainly come a long way. So this is what I have learned so far…
Good pictures have a good composition and depth. The best pictures though, are the ones that tell a story and that makes them timeless. Those are the ones that touch our hearts and stir up emotions. Since, smartphones have turned to our-go-to camera, then it’s time to for trying to make better pictures. No more excuses!
Surprisingly, the most important thing I have learned is that you need to pace yourself. More often than not, pictures that were taken in a haste were a lot worse than I wished for. This resulted in many do-over sessions. Ughh! Hence, in order to take better pictures you really ought to slow down a bit and see more. At the same time you’ll be able to do more of what needs to be done as explained further down.
Taking better pictures with a smartphone – technical aspects
Taking better smartphone pictures involves knowing aspects with regards to the technical stuff, the composition, post-editing and having a good, sound understanding of the subject matter. So let me begin with the technical aspects.
Get closer
This applies a great deal in capturing photos outdoors (generally) and in nature. There are instances where you want to capture an idyllic scenery, but you are simply too far. It’s best to get closer and not zoom in, because the picture will look worse – grainy. Instead, try to get closer if you can. If you can’t then, zoom in (as little as possible). Sometimes it may help to sharpen the image in post production, but not always. Note that this may not matter much in newer smartphones, so be sure to test your phone’s zoom capacity before you set out for a photo shoot.
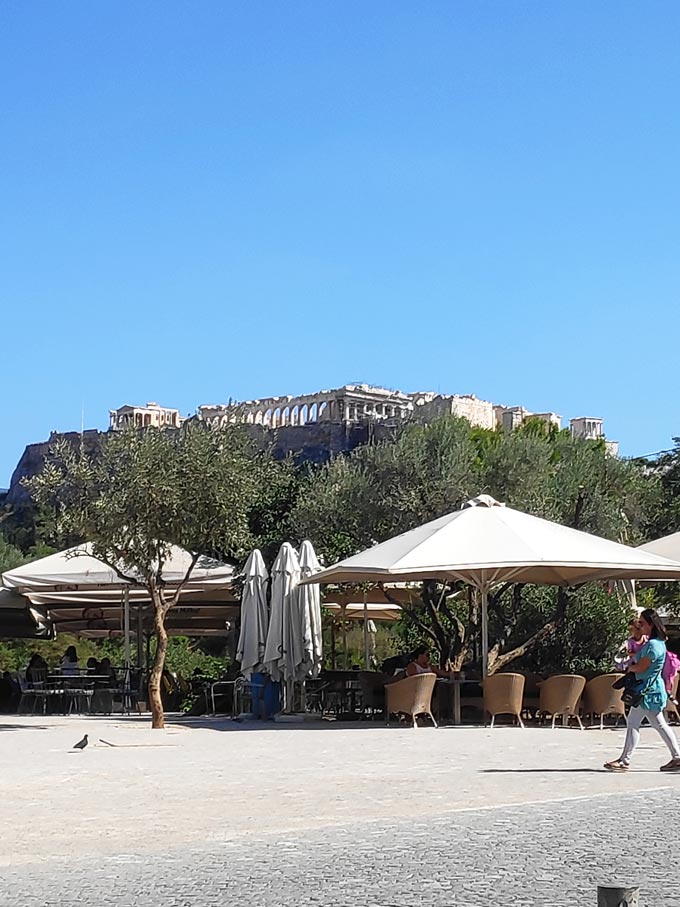
This is a typical touristy kind of picture and there’s almost nothing right about it. It’s a real bad picture, because I tried to take the Parthenon from afar, in a haste, without taking good note of my poor perspective (in terms of delivery output). To make things worse, I zoomed in knowingly that it will look grainy. The only thing that’s right about it, is the fact the Parthenon is dead center. Anyway, I’ve kept it as a reminder of a bad picture from downtown Athens.
Note: All the images presented here have not been post-edited (unless stated). The reason is that I want to show you that truthful images with no filters or major post-editing are possible to achieve even with a smartphone camera.
Step back
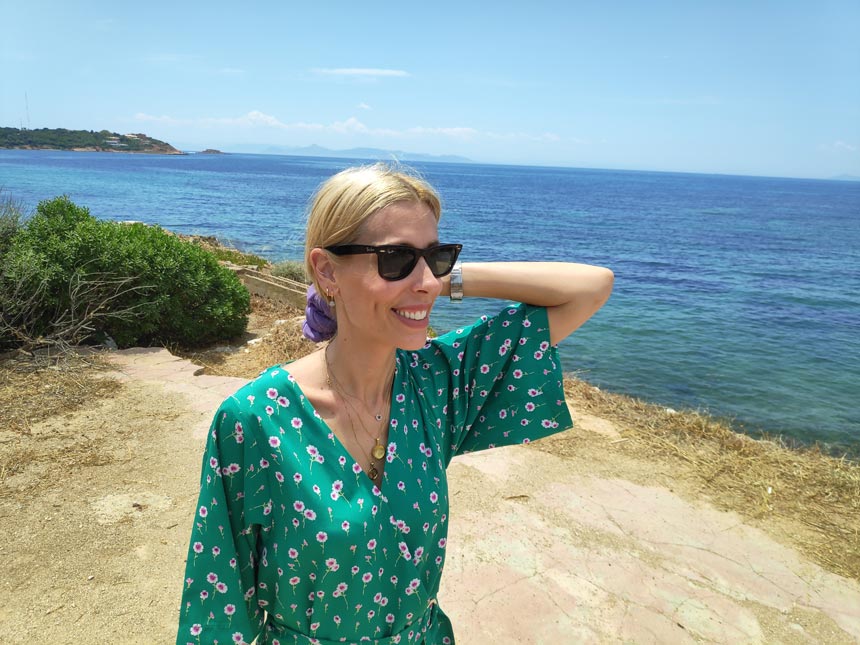
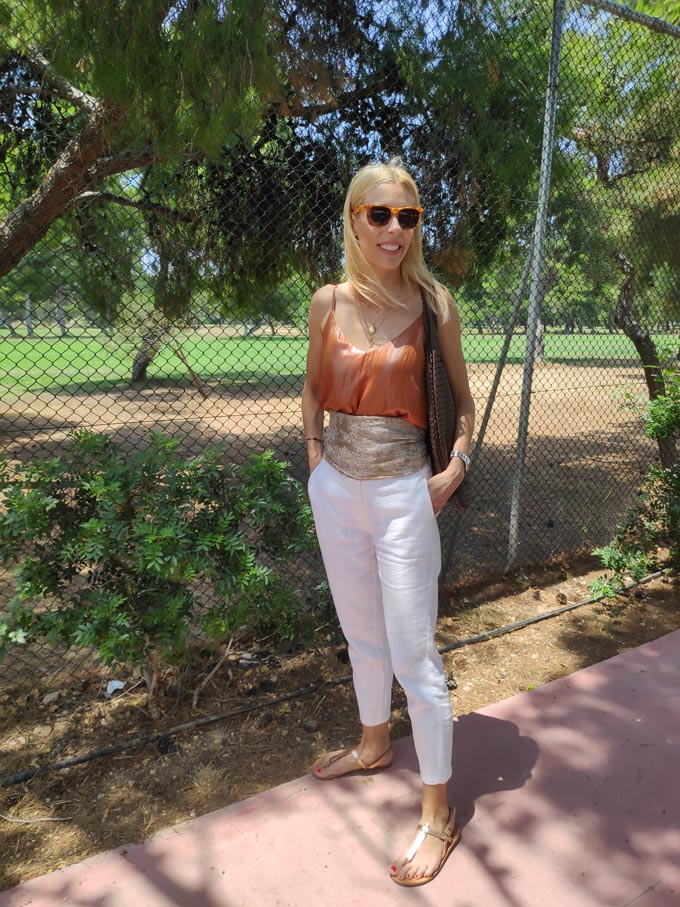
Knowing when to step back to frame your subject best is just as important as getting closer if needed. Too many times, people get too close. However, if you step back you will achieve two things. First thing, you will gain more ‘negative space’ that translates in an image with greater impact. The other thing is that it becomes a lot easier to edit afterwards by cropping out any unnecessary boundaries. This is something I have found that applies a great deal when taking portraits of people.
Portrait mode
This mode allows you to fake the depth of field. In other words, when selected, the background becomes blurry by software means in an effort to simulate a shallow depth of field (it ranges from f1.8 down to f16). My recommendation is to use this mode with modesty. If you’re too close to your subject (i.e. 1m away) then, chances are that the boundaries of your actual subject may also go blurry. And that’s not what you want.
In this image next, I used the Portrait mode, but I got a bit too close. Hence, if you look closely at the left pointy tip of the cake and the powder sugar on the black platter, you may notice how it looks blurry.

Again, using the portrait mode and the same subject matter, I stepped back a little and the blur zone is limited mainly to the background. Also the cake slice itself looks far more crispy. No further editing was done.
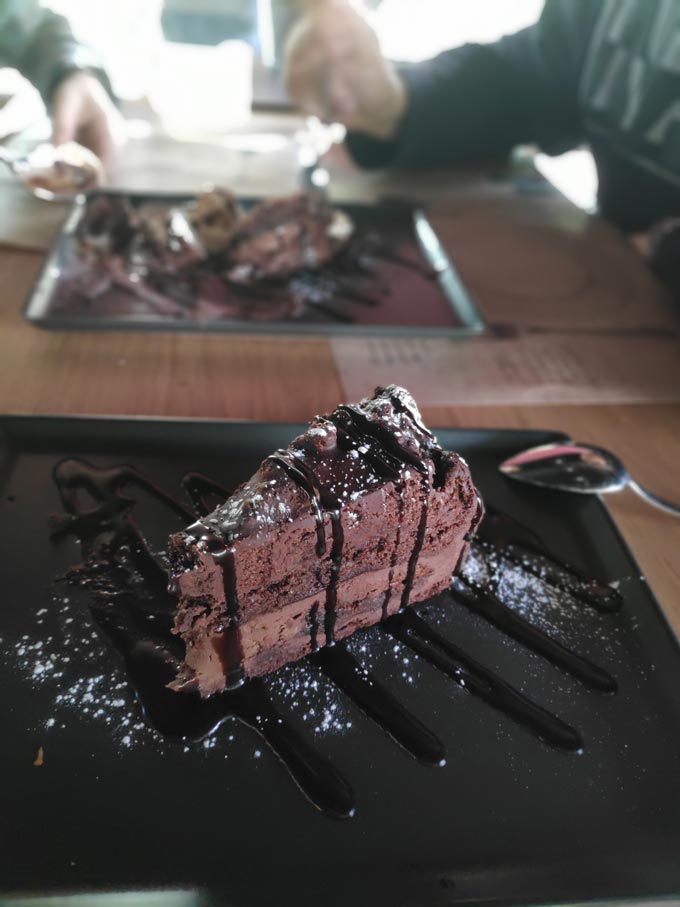
No additional editing was carried out in the two pictures above, other than stepping back. That made a big difference. Another great thing to note about this mode is that you can always edit your image later on and remove the blur altogether (if you so wish).
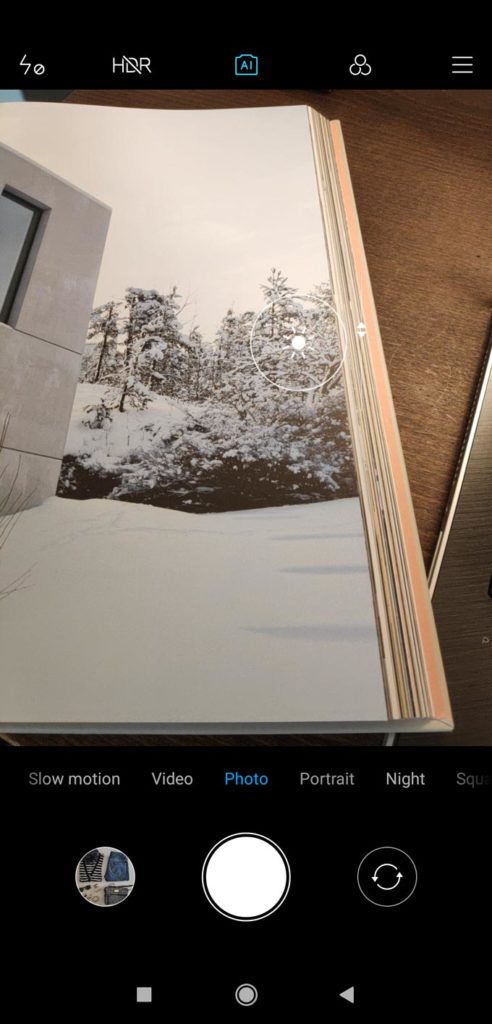
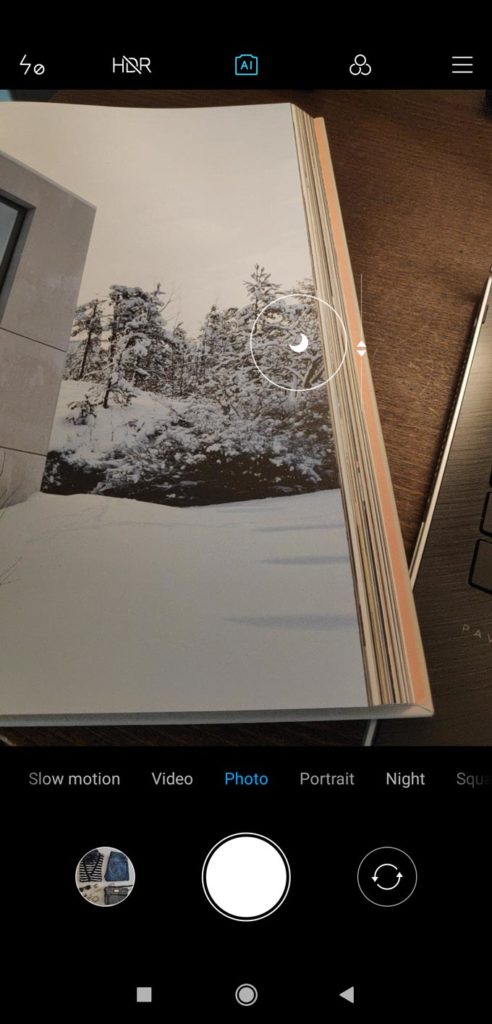
Adjust the focus
This is very important step. Most people rely on the auto adjustment. Yet, it’s almost always best to manually control what you want in focus and what out of focus. Simply, when in photo mode, tap your screen at the spot where you want things to be in focus. The circle that will appear is the indicator of your chosen in focus spot.

Depending on what you’re shooting, you may have to either get closer or step back. For example, in the picture above I had to get closer to focus manually on the chocolate bits. If however, I was shooting a scenic landscape outdoors, then I would never get this close to my subject matter. Instead, I would most definitely center onto my subject matter and adjust the focus manually onto it.
Depth takes any image to another level. It is like chasing a moment where an opportunity comes to life and you are there to capture its very existence.
Adjust the exposure (light meter)
Subjects under intense lighting have harder shadows and usually intense shadows. Therefore, it’s vital to manually adjust the light metering before you take the shot. Again, tap the screen when in photo mode and increase/decrease with the arrows. I have found this function particularly useful when taking video footage using my smartphone and the light is rather low.
Soak in natural light
If you live on the Northern hemisphere, then taking pictures during the winter is far easier than in the summer. In every case, nothing beats the early morning or early evening light. Thus, make it a point to take pictures within that time frame, where the light is more gentle and the shadows much softer.
Also make sure that your subject is drained in soft light from all directions. That’s awfully important when taking a portrait photo of a person and don’t want them to appear with dark circles under their eyes, just because they are under the sun at noon!
Hard shadows are anything but flattering. If for any reason though you have no choice but to take photos at high noon, then try to find a location that provides some shade. Otherwise, you will need help from someone to hold up reflectors for you, to compensate for those shadows and/or do a lot of post-editing later.
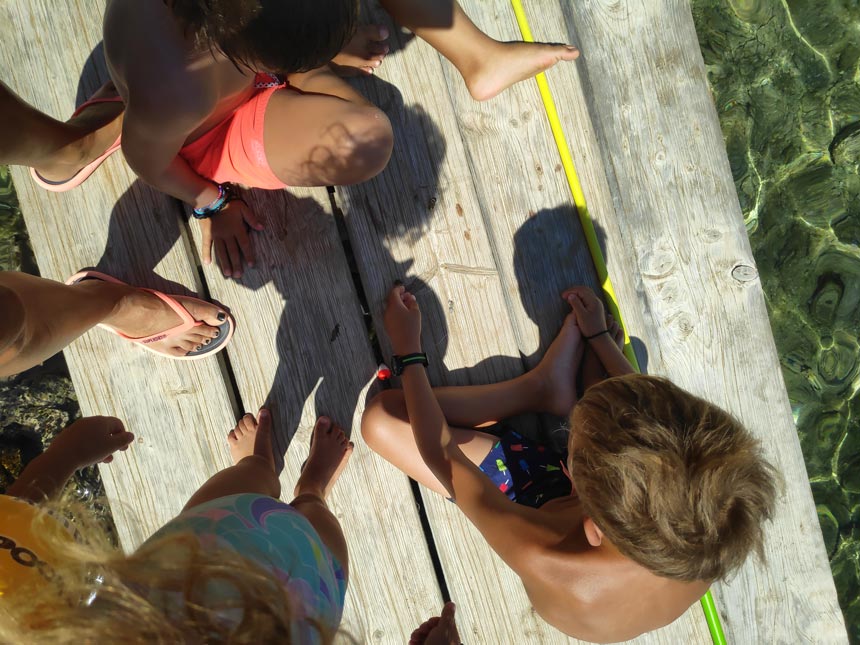
This is another example of a bad picture because it was taken under direct sunlight in the afternoon on a summer’s day!! This is the kind of picture you must avoid taking. Notice the hard shadows that make it difficult to appreciate what is happening. It takes away from your story!
When to use the flash
There are two instances that require flash. The first one is during the daytime when you’re shooting products, except glass. (It makes shadows softer). The second one is at night time and only for shooting at something up close (i.e. 1m away or so). Don’t attempt to shoot a landmark with your flash. It will absolutely and utterly spoil the image.
Smartphone cameras have a night mode that you can also employ. However, it requires an extremely steady hand (while lenses remain open to take in the light). Better yet use a tripod. Honestly though, don’t expect too much is your subject matter is way too far and not lit enough.
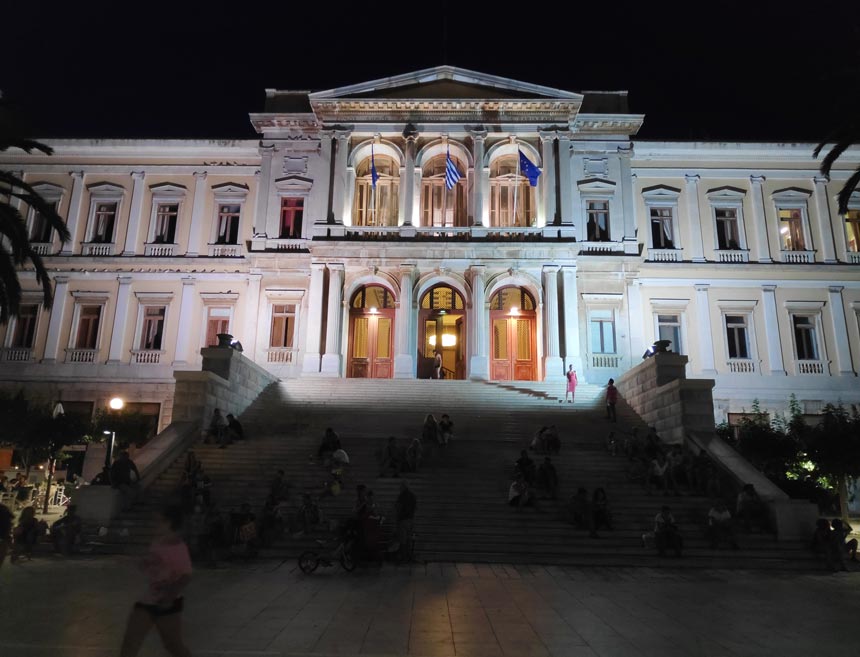
The following image is an image of a landmark – the Town Hall of Hermoupolis in Syros after sunset. Anyway, I did not use my flash light or night mode and I also adjusted my focus manually onto the building. As a result, the stairs appear quite dark. Then, I went a tad bit closer and took another shot. This time I focused on the stairs and adjusted up the light meter. Hence, in the larger image below, the stairs become more visible – more noticeable. The resulting image is far more balanced in terms of composition. No further post editing was carried out, like straightening the horizon which I will discuss further below.

Suggested side-read: Postcards from Syros :: The Guide. In this guide, I share all my insights on what and where to when in Syros.
Lens distortion
Smartphone camera lenses are subject to some distortion. It has a lot to do with the way you hold your smartphone and how you frame your subject. For instance, if you take a photo of a friend while you are down on your knees and looking up at him/her with your phone at an angle, then the legs will look dis-proportionally long compared to the head. Also, beware when taking a portrait picture not to fill it up. It’s best to step back and crop later during post-editing.
Ready, point, shoot
This tip deals with some of the most obvious habits that one should carry out as if on auto-pilot. Unfortunately, many of us mess them up. So even if they seem silly to you, trust me they aren’t!
Photo taking procedure
- Always make sure you keep your fingers off the lenses. Keep a wipe close by (the kind you use for you sunglasses) to wipe clean your smartphone’s camera lenses.
- Next, point at your subject, frame it and keep as steady as possible. A shaky hand means less sharp photos at best. (If you shake quite a bit then, I’ll have you know that it really helps to stretch your arms, point and then shoot.
- Change your perspective/angle.
- Repeat.
A little tip within a tip: A button or ring mount can help you keep your phone more steady without the constant worry of dropping it.
Composition
As mentioned earlier, good pictures have good composition and depth. So even if you ace all the technical aspects, you still need to know some basics about composition, starting with the “rule of thirds.”
The “rule of thirds”
I have found that the best pictures I take are the ones where my subject is in the center. That’s basically the idea behind the rule of thirds, where an image gets split into 9 thirds (3 rows by 3 columns). That’s done with the help of a grid-like overlay. You can switch those grid lines on your smartphone when in camera mode under ‘Settings.’
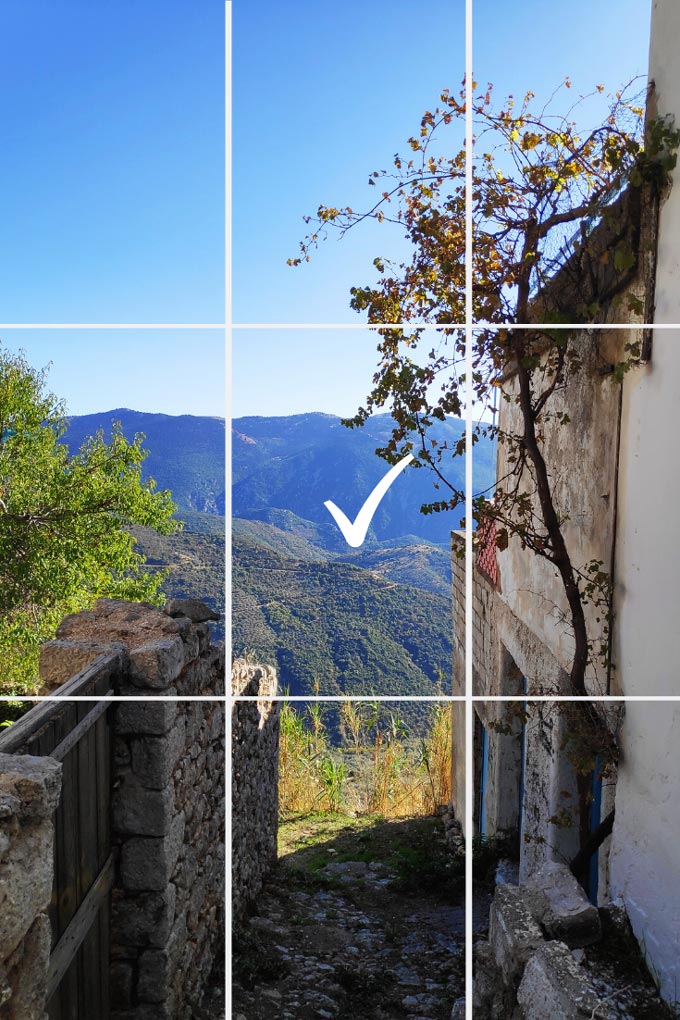
The aim is to frame your subject the middle of your smartphone’s grid. Personally, I have never used them. Beats me why. Nevertheless, I truly believe that they can help anyone improve their skills as a photographer.
Grid lines make it a lot easier to look for patterns, aim for symmetry and give you better control of the negative space. Plus, they can also help you align your horizon, which in turn means more “straight” pictures and less rotating in post-editing.
Depth
Depth takes any image to another level. It is like chasing a moment where an opportunity comes to life and you are there to capture its very existence. And obviously, it takes practice to learn to scout for the best spot in order to achieve a good sense of depth. Therefore, don’t be discouraged and keep trying.

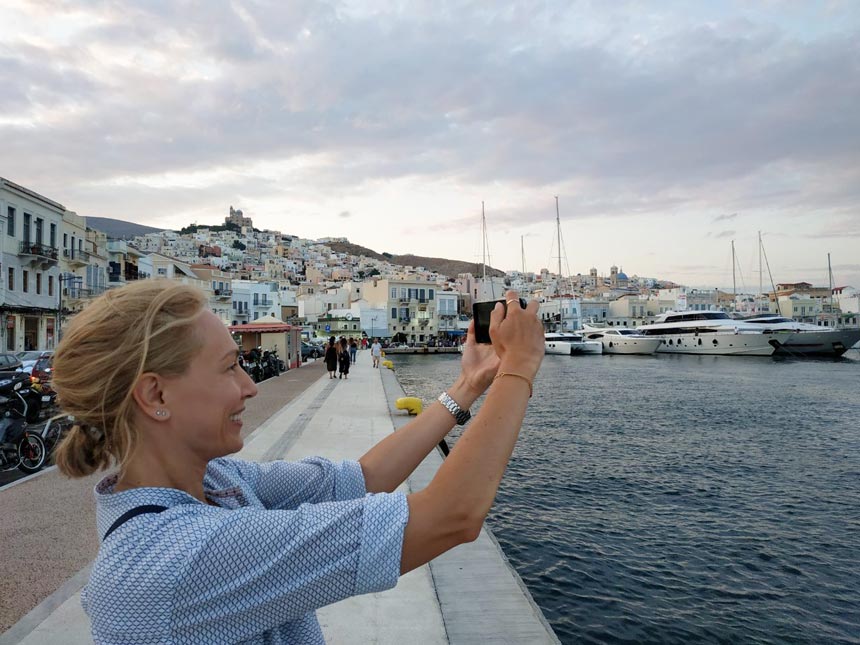
Now, both of these images were taken at the same location on the same day, just minutes apart. The one with the sailing boats is an example of a bad picture, because it’s “noisy” and flat. It has no depth since the boats are too close together, you can’t make out the land or the sea and therefore, it isn’t pleasing to the eye.

However, the photo with the two yachts has some sense of depth to it, for they are spread further apart, making it far more pleasing. The reflections on the water help guide the eye to the center of the image where the second yacht is seen. The point though is to try to change your perspective in order to frame your subject with care.
Portrait or landscape format
Have you ever wondered whether that picture you thought would look awesome would look 10x better if you took it in another format? Here’s a little exercise for you. I will show you below four pictures in two sets. Each set has the same subject matter, taken at the exact same location, just moments apart. Their only difference is their format. So I want you to decide which format is best. (Go on, use the comment section below).


The truth of the matter is that it’s not always clear which format is best. The portrait format tends to have more negative space (top and bottom). Hence, this usually increases the impact. But when it comes to a scenery somewhere in nature, then landscape format may work best. Panorama format is best reserved for capturing a landscape like a cove or a beach, so don’t go crazy with it. In every case, the format depends a great deal on the “story” you want to tell.
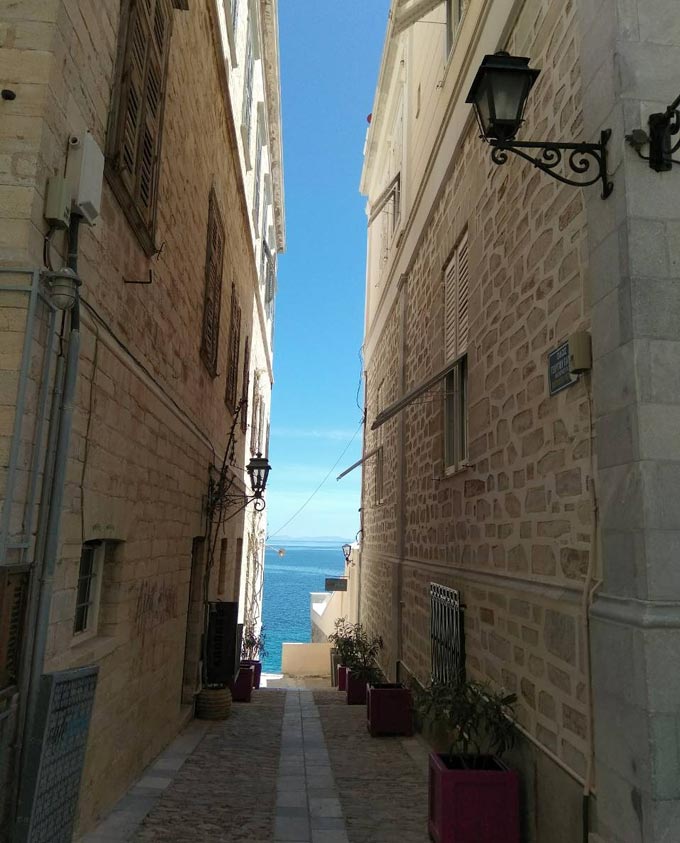
Use guide lines
When taking a picture, it works like a real charm to use guide lines whenever you get the chance. These help you center your subject matter for the viewer, create a sense of depth (in some cases) and even help you tell a story. For instance in the picture below, the stream forms a guideline leading to the center of the image.
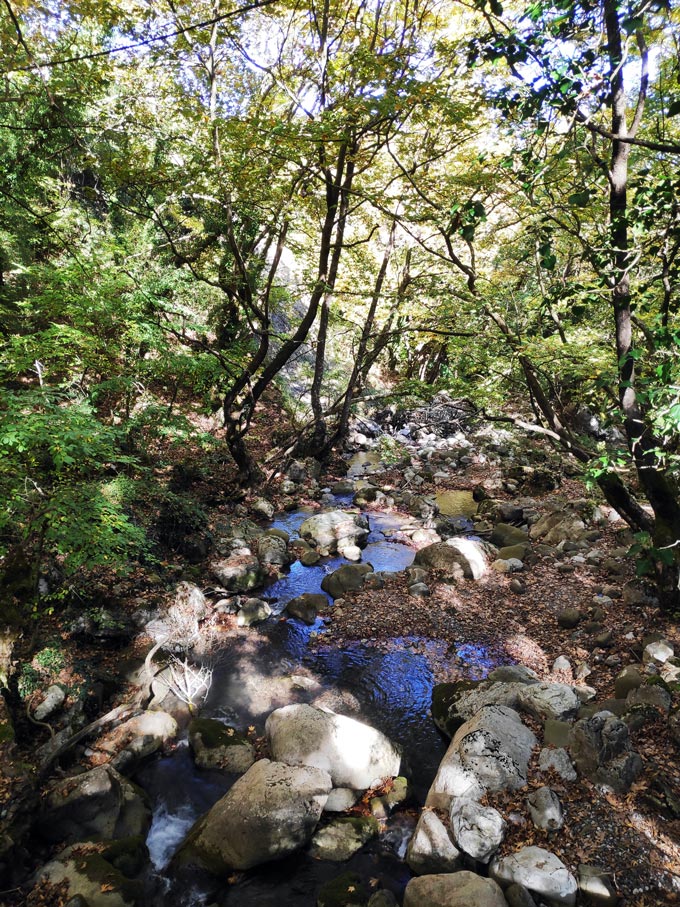
Roads disappearing in the horizon and reflections on water are two other types of “guidelines” that can be smartly employed.
Post-editing
The fact of the matter is that if you follow the guidelines above, you should have very little editing to do post-production. However, remember that even the best professional photographers edit their photos. Some may go as far as to remove unwanted objects, face wrinkles or cellulite with software like Photoshop. Lightroom and Snapseed are two popular free photo editing apps to consider as an alternative to Photoshop.
(By the way: This YouTube Channel has some great tutorials on Photoshop that should be of real help to you).
Most of us though, will fiddle with crop, saturation, brightness and contrast levels. Others add on filters too. Personally, I don’t add filters (not even in my Instagram posts). I’m simply not into them. Moreover, I don’t tweak my pictures too much. That’s because I believe in the beauty of imperfection. Hence, I strive for a photo that looks sharp and crisp, but at the same time as genuine as possible. See below what I mean.


If you play up the brightness level, then it follows that you’ll have to turn up the contrast too in order to keep the image’s sharpness. However, you may have to play down the saturation level just a tad bit. In Photoshop, you can also adjust the exposure and gamma correction instead of the brightness and contrast duo.
On a rare occasion I have used the vignette option in Instagram’s photo editor. Still, I use it with caution when I want to “highlight” my central subject matter by darkening a little the perimeter. Too much of it though, results in a vintage effect that doesn’t appeal to me.
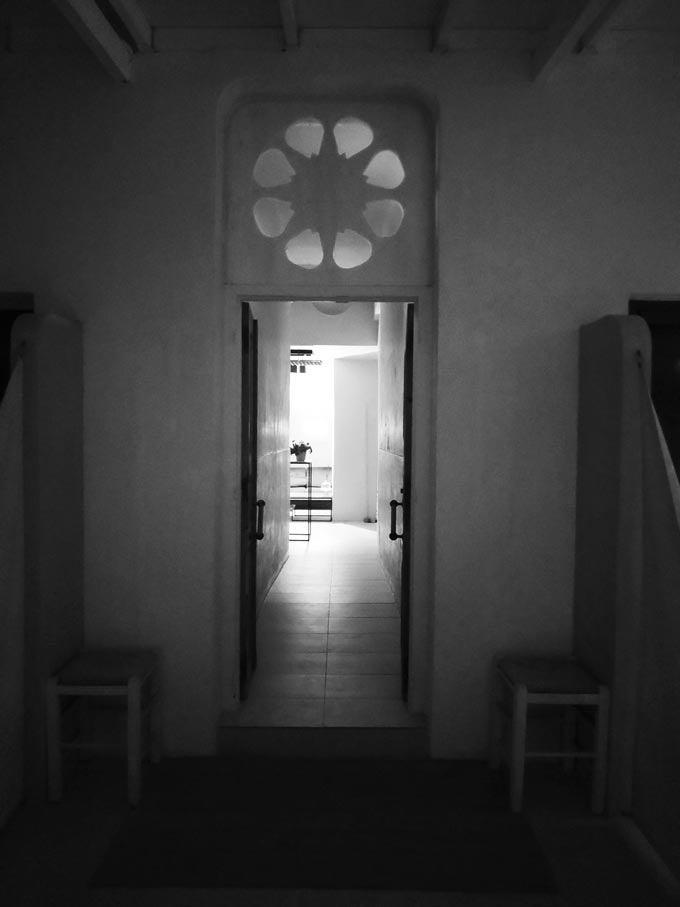
Go black and white
Every smartphone grants you access to a greyscale filter. So whenever you have too many colors and things going on, that may distract the delivery of for your message, that’s a good indication to try out a greyscale. After all, black and white images have a timeless quality about them because of the impact they make.
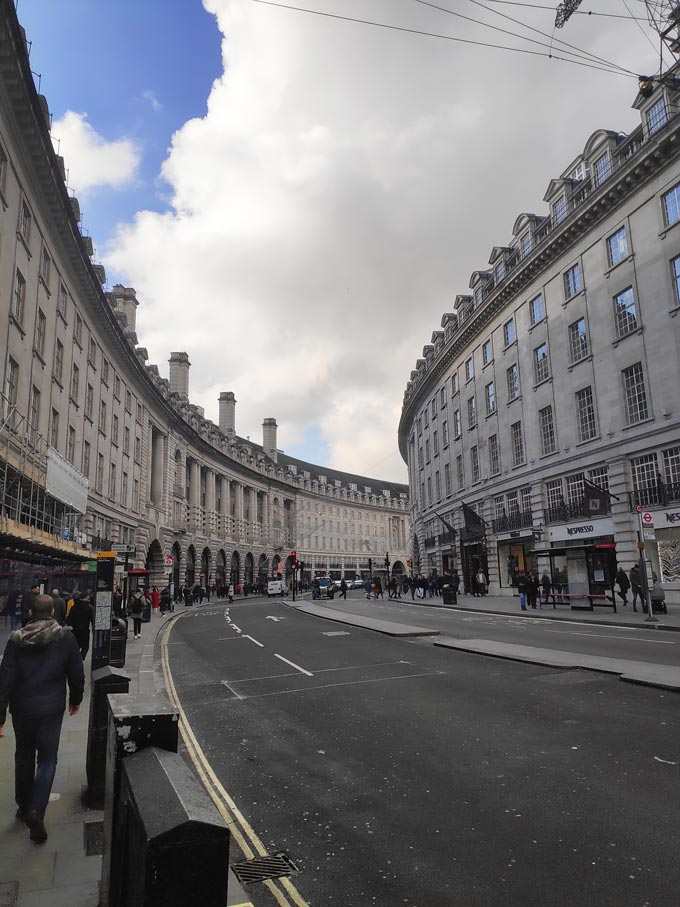
Embrace negative space
Some of the most impact-full images are those where there’s a “large” surrounding negative space (usually top and bottom of image). It allows one to focus in on the subject matter, while giving away information that help in the narration of the story.
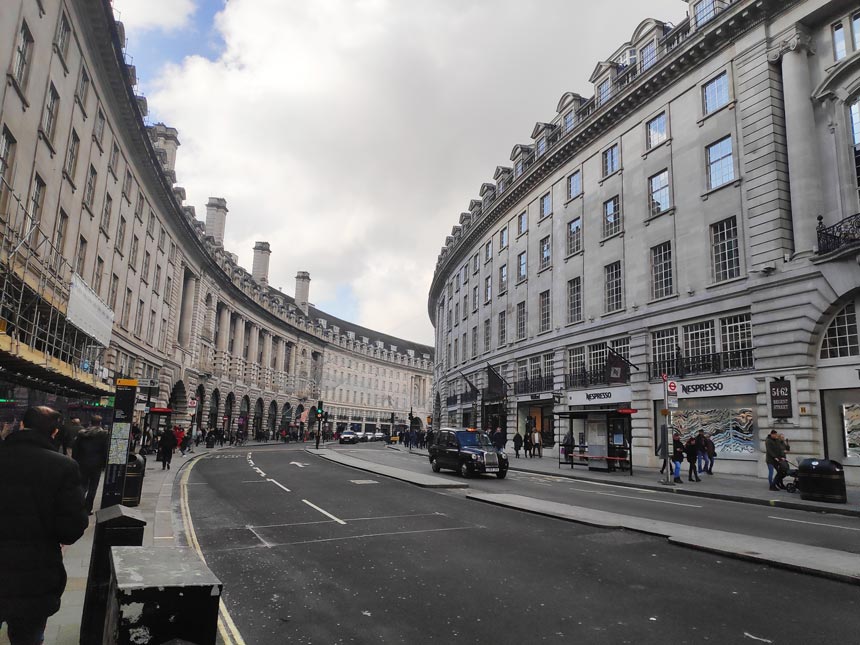
For example in the first set of photos of Regent Street in London further above, the portrait format shows more of the sky – negative space. That’s why it’s more punchy than the landscape format image.
Furthermore, many photographers with a “minimal” approach tend to embrace negative space a lot. Therefore, it’s very common to see negative space working exceptionally well in flat lay photography.
The subject matter
Now that I covered all the fundamental stuff on the technical aspects and composition, I think it’s time to mention a thing or two about the actual subject matter.
Much too often, I have found myself in an amazing spot. Instinctively, I pull out my smartphone to take a photo, but I fail many times to capture the greatness that surrounds me. Why is that? My best answer is that I do not pause long enough to think over what is it about my surroundings that I want to talk about and how to go about it best.
In other words, my mistake is that I don’t think of a story behind each snapshot. This results in dozens of pictures that fail to deliver any message, look flat, or worse boring. As such, it follows that I end up wondering ‘What was I thinking for taking that shot?!’ My only consolation is that everyone has been there too! And I mean everyone!
Thereupon, the best advice I can give you again, is to slow down and think over what it is that you want to say, capture and deliver it. Try to find the value behind each shot and make every camera push-button action count.
Closing
I will close off with one last example – three images with the same theme, taken over the course of three summers. Can you see the improvement?


So what it boils down to is getting to know your smartphone camera better and practice, practice and more practice all the fundamentals of good photography…
Yours, xo

P.S. For the second set of pictures with the three boats in a cove, under the Portrait or Landscape format, the best format would be landscape. 🙂